Wednesday, May 14, 2014

All Bottled Up!

Welcome to our blog "All Bottled Up". 
Below are recordings of our progression through MPO2 'Alternative Wall Construction' project. The sustainable building system we have chosen is mud and glass bottles. 
Our team members are Brian Whatley, Tom Fleetwood and Dion Staffieri. 


(Please click on the photos to see a larger view) 

Tuesday, May 13, 2014

Water Test: Mud/Glass Bottle Wall

Video Recording of 5 minute Water test on Bottle wall with Mud binding:
(can be viewed full screen by clicking the bottom right corner icon while video is playing) 


The water test findings:

The structure held up to the water test. The mud remained in tact and there were no signs of disintegration after testing the wall a few minutes after the water test.

There was some water behind the window pane which came in under the sill. We know from the test that we should have put a flashing behind the mud before it was packed up against the bottom of the window pane and a mud sill built up against the back of the window pane to keep the flashing in position. This would have prevented water from entering underneath the window pane.

The roof worked well to direct water away from the mud wall face.

The lime and manure did well to bind and harden the mud wall and improve it's water resistance ability.

Below is a short video showing the condition of the wall a few minutes after the water test:

Monday, May 12, 2014

Sunday, May 11, 2014

Wall Production: Post 04

The Final Stages of Wall production

Wednesday 7th May - Complete Roof Production
Image 41, 42: 


After completing Wall production on the 21st of april, the wall was covered by a tarp
to shield it from direct sunlight and the elements as it was given 2 weeks to cure. The 
tarp was removed on Wednesday, 7th may as we prepared to complete construction
 on the roof.
Image 42, 43, 44:


The wall is tested for strength and consistency, it is noted that the colour and consistancy of each layer of mud differeed in colour depending on how much lime was added to the mixture. Through initial experimentation we found that the mud with a higher lime % was lighter in colour and had a smoother texture the mud with a lower lime %, this can be seen in the images above with the lower layers having a lower lime to soil ratio.

Image: 45, 46, 47, 48:


Now that the mud has cured enough to support itself, the timber frame is removed by taking out the temporary screws (This timber will now be taken to Toms farm for re-use). The mud that was covered by the frame is dry, hard and strong.

Image 49, 50:


Now that the wall is ready for the roof sheeting to be fixed, the sheet roofing and struts are measured out and two red marks are made on the roof sheeting. Pilot holes are then drilled through the roof sheeting so that that the screws do not split the fibreglass. Self sealing screws were then used to fix the roof sheeting to the struts to prevent leakage.

Image 51, 52, 53:


The Wall is complete. A side an front elevation accompanied by an image which shows how the window, lintel, struts and roof sheeting fit together. Wall construction is complete on Wednesday 7th May ready for the water test.

Note: two small lengths of recycled timber were propped against the back of the wall to spread out the load of the wall. These will be removed prior to the water test.

Saturday, May 10, 2014

Wall Production: Post 03


 The mud is compacted up and around the stake to the top of the window board. Whilst being compacted, the mud is supported by hand from the front to prevent collapsing. The stake is then cut level with the top of the window to provide a structural support and fixing point for the timber lintel placed over the window. 


The lintel is then cut to size and laid in place to check for size. It will later be fixed to the top of the stakes on either side of the window but is first needed to construct the the roof frame. 

Levels are then checked and the form work is then replaced ready for work on the roof structure to commence.  


Reclaimed timber floor boards were used to create roof framing. The boards were cut to form an angle that allowed water to flow off the roof preventing ponding.    
Discarded off cuts of roof sheeting were spaced out and over lapped to equal the width and align with the ends of the wall. Centers of the roof frame were then calculated to align with the flat areas of the sheeting. These points were then marked.      


The angled timber roof struts are then screwed into the lintel. They are spaced at the centers that were calculated on the roof sheeting so alignment can be achieved.    


The lintel, now with roof framing, is then ready to be fixed to the top of the stakes on either side of the window. To prevent leakage and create a tight seal, a scrap off cut of timber was fixed between the lintel and the top of the window. This also gave the window top-end structural support to restrict movement under load.  


The roof sheeting is then placed over the roof struts to check for alignment. 


 The mud mixture is then laid around the roof struts on top of the lintel. A thin layer is first placed and compressed and then the bottles are placed on this layer. This creates a base for the bottle and restricts movement. 

Once the base layer is compacted, one bottle is placed between each strut. After the bottles are in position mud is then laid over and around the bottles compacted tightly insuring there are no air pockets which will weaken the wall and reduce water proofing. 


Side form work boards are temporarily removed to check the positioning of the bottles and their visibility between the mud. The boards are then replaced and the wall is left to cure.     


Friday, May 9, 2014

Wall Production: Post 02

Image 11 and 12

Bottles are pressed into the mud layer. The bottles are placed alternating the neck facing forward and backward to allow for more bottles to be placed into the wall. Mud is pressed down between the bottles and a layer compacted on top of the bottles, thick enough to cover the bottles and allow for the next layer of bottles to be pressed into the mud. We used matching bottles for each layer to ensure a consistent wall thickness and it allowed the ends of the all the bottles to finish flush with the mud wall face.

Image 13

We stopped at this level and covered the frame with tarp until Wednesday, 23rd April 2014, to test the hardness of the mud wall after it had about 36 hours to set. It was a good test to see if anything needed to be changed in the mud mixture. On the Monday we used a cow manure compost blend and we used a pure cow manure on the Wednesday to improve the mixture and make it more water resistant. More lime was also added into the mixture. In later photos you can notice the colour of the wall change. This is due to the mixture improvements and the water making its way from the top layers down to the bottom and eventually away from the bottom of the wall through the timber pallet.

Image 14 and 15


Each section of wall (to the depth of each front timber formwork) consisted of compacted mud, a layer of bottles, another layer of compacted mud, another later of bottles and lastly mud pressed between the bottles ready for the next section of wall to be built on top.

Image 16 and 17

The level of the wall was checked each time a layer of mud was added and compacted to ensure a finish which would show the bottles running neatly horizontally along the wall.

Image 18
 
Reclaimed hardwood timber stakes were bedded into the mud. The paling fence we used as a lintel for the window would later be fixed to the stakes to give it added stability in the mud wall to carry the load when more layers of mud and bottles were pressed on top of the window.

Image 19 and 20


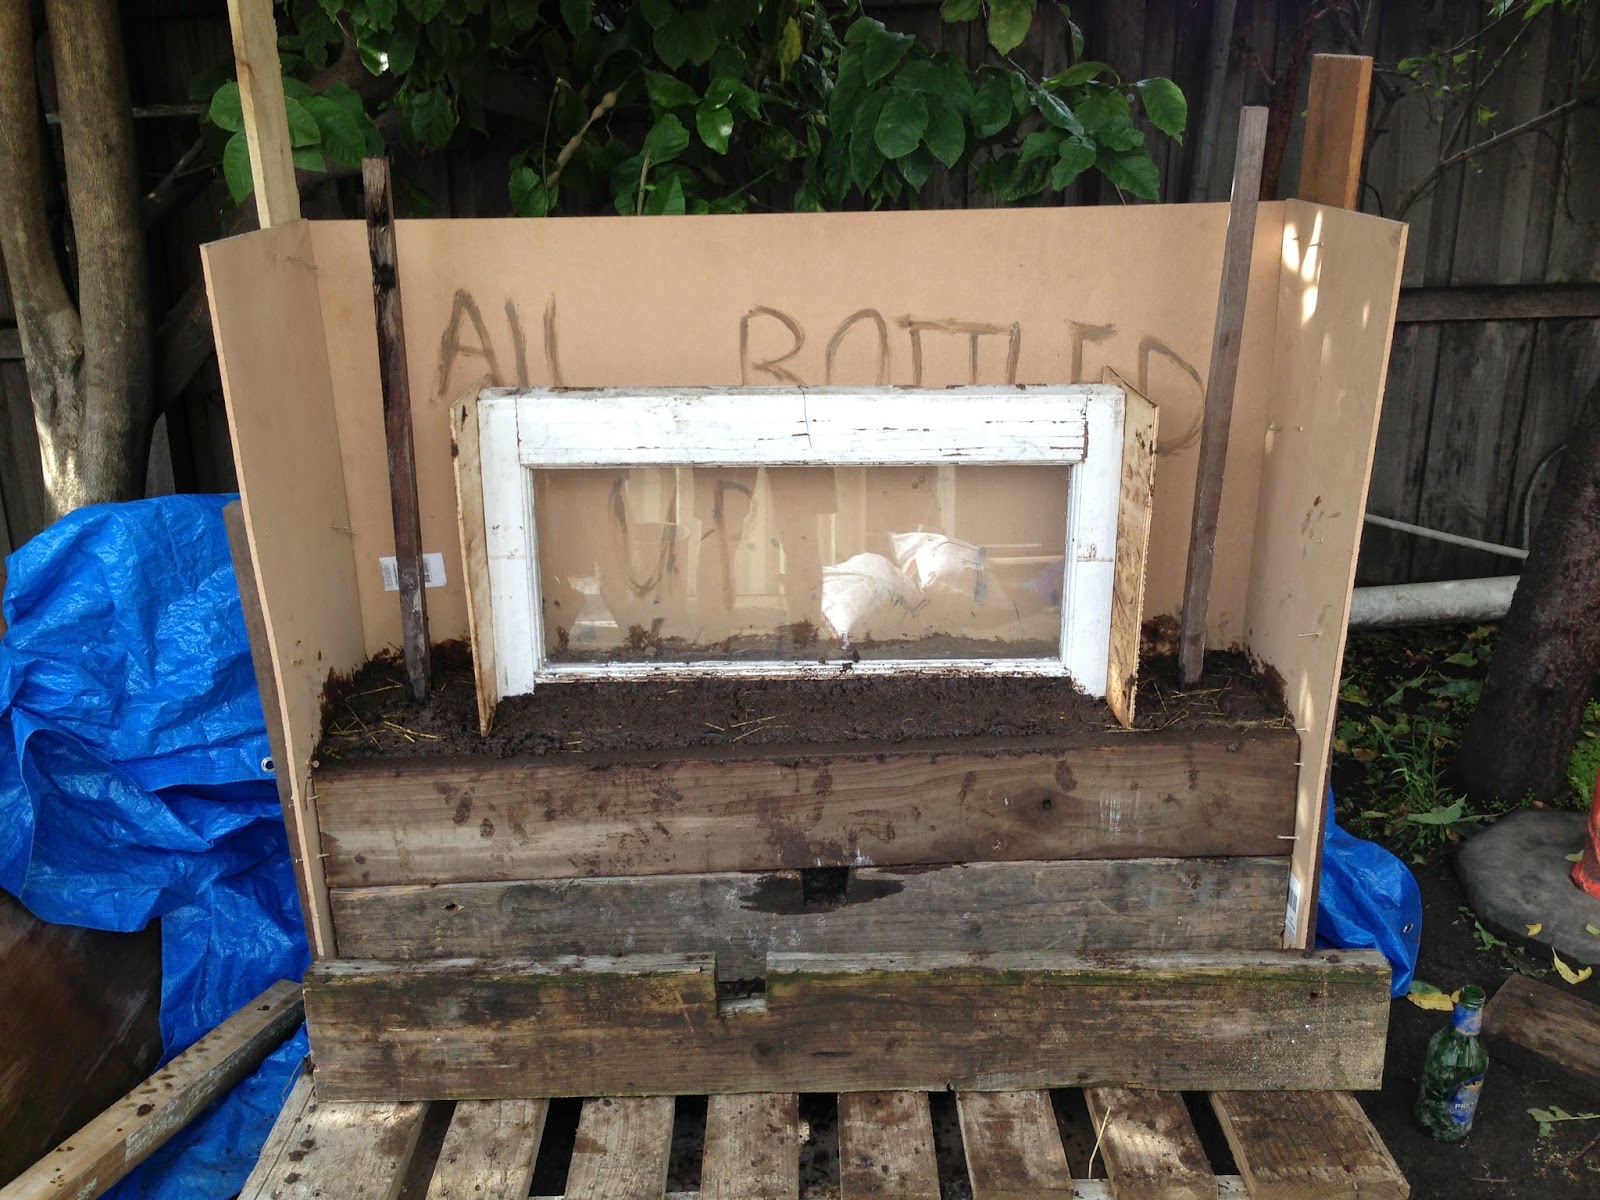
Board cut to the depth of the wall (~200mm) is fixed to each side of the window so that mud can be packed tightly up against the window but still provide a neat finish between mud wall and window opening. The board also provides seal to the window to prevent water and moisture from the wall from reaching the window.

Mud is packed tightly up against and over the window sill to prevent water from getting in behind the window and wall. The mud is packed at an angle to provide a sill to the window and allow water to drain away from the window and run down the mud wall instead of pooling on the window sill.

Image 21, 22, and 23

Mud is packed up around the stake and the window boarding to anchor the stake and fix the window in position. Care is taken as the wall gets higher to prevent the mud from pushing out against the front timber formwork by fixing screws into the side frame work and pegging the screws against the front formwork.


Image 24
Group photo showing Dion and I mixing the mud for the top layers of the wall over and along the sides of the window and Tom preparing the struts that will hold the roof sheeting.